Table of Contents
Gutters aren’t just decorative — they’re crucial to your home’s functions. They help shed rainwater, keep your landscaping safe from flooding, and even help during the snow thaw!
Hiring a professional is the way to go if you are considering upgrading your gutters. They’ll ensure the job is done correctly, saving you money in the long run.
Getting Started
Gutters move roof water away from the house through open-topped channels attached directly to the fascia and closed pipes called downspouts. Gutter systems are easy to install and fairly inexpensive when purchased from home centers and other home improvement stores. However, installing a one-story gutter system requires a sturdy ladder to work from and the right tools.
Before starting, ensure the fascia and soffit boards are in good condition; if any are rotted, repair or replace them. Also, check for damage to the shingles and roof sheathing.
Working on a ladder during gutter installation in Lafayette, LA can be dangerous, especially when cutting metal. It’s best to do this job with an assistant and wear heavy gloves and eye protection.
Before installing gutters, mark a chalk line on the fascia board to indicate where your slope lines should be. The ideal slope is about a 1-inch drop for every 20 feet of a gutter run. If the fascia is level, you can use a tape measure and a level to create a line on the board.
Installing Fascia Brackets
A gutter is a trough for collecting rainwater. It’s usually mounted to the edge of an eave to protect it from rainwater damage. You can also mount it on the wall of a house to keep it away from a foundation, which can cause structural problems and rot.
Gutter installation requires great attention to detail, physical strength and a fit body. You will be working on ladders and using power tools.
Start by determining the proper slope of the gutter run, which can vary by manufacturer and home. Generally, the best gutters slope downward (1/2 inch for every 10 feet) to ensure water flows toward the downspout.
To set the slope, drive a nail at the highest point of the gutter:
- Run on the fascia board and stretch a chalk line between it and the pin.
- Repeat on the other side of the gutter run, then use a level to verify the slope.
- Adjust the pitch as needed before continuing with gutter installation.
- Cutting the Gutters
Once you’ve finished installing the fascia brackets, it’s time to cut the gutter sections to length. Start by securing the gutter section on a flat surface and using a combination square to mark a line around the flange edge of the gutter (where it overlaps with the bottom of the trough). Cut along this line, ensuring you’re cutting outside the gutter outlet hole.
Wear protective gear while working up a ladder, and have someone with you to help with safety and support. Testing the gutters for leaks before you install them is also a good idea.
To shorten the gutter sections, use a hacksaw or a power miter saw with a carbide blade. Alternatively, you can use tin snips to make the cuts, but be sure to have green and red ones at hand to alternate cutting. If you’re using an aluminum gutter, crimp the top of each section inward with pliers to prevent water from leaking between the sections. Mount these sections to the fascia with lag screws, and hang the downspout elbows to complete the gutter run.
Hanging The Gutters
Gutter installation is heavy-duty work, especially on a steep slope. Always work with a partner to keep yourself safe and on the job. Working alone puts you at risk for injury and a stalled project.
Gutter sections are slid into place and seamed with special brackets that snap on the gutter and fasten with long screws. This technique eliminates the need for a tack or nails, which can pull out under heavy rain and snow weight loads.
For long gutter runs, slope the gutter down in both directions from the middle and put a downspout on each end. Then, run the next section into place, aligning it with the chalk line and driving in the long screws attached to each fascia bracket.
Rub soap on the lag screws to make them easier to drive through fascia boards and into rafter tails. Repeat the process for each 10-foot section until you reach the end of your gutter run. If the gutter continues around a corner, cut it with a hacksaw and tin snips at an angle.
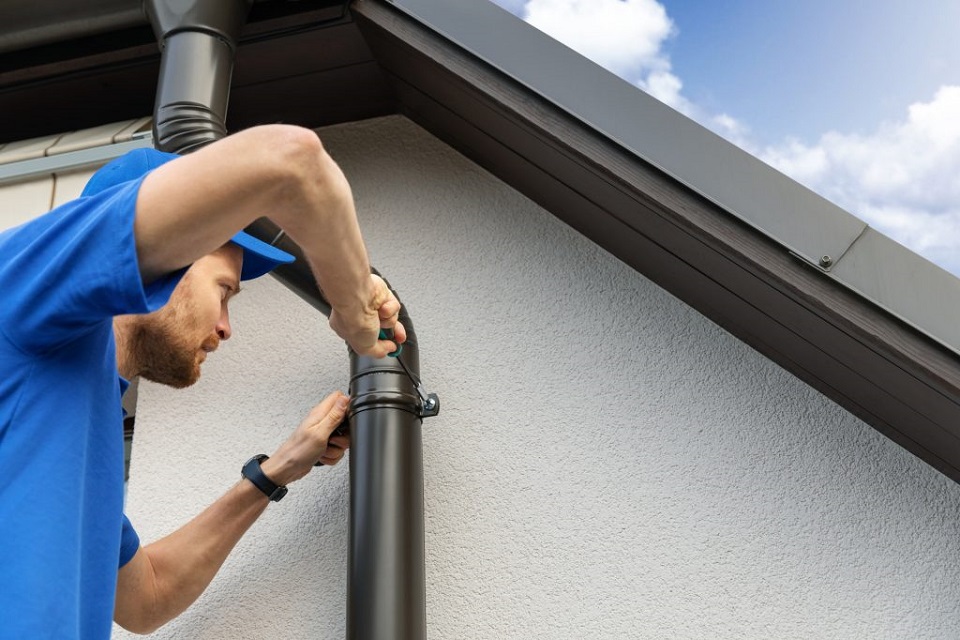
Attaching Downspouts
Downspouts keep rain from harming your roof, siding and home’s foundation. Without them, water would collect in the gutter until it overflows and gradually wears away at the fascia board, causing rot, shingle damage, structural deterioration, rust and mold growth.
Before installing the downspouts, mark where you want them to start and end on the eave. Consider locations where you can divert the water, such as a sidewalk or electric meter. You can find fold-down diverters that attach to the bottom of downspouts and allow you to direct the flow of water.
Once you have your downspouts and elbows, assemble them by inserting the short length of the downspout into the opening in each elbow. Then squeeze (or crimp) the ends of each downspout section to ensure they fit inside the next one, and seal any connections with gutter sealant. (Make sure to use an adhesive designed for metal gutters, as regular household silicone can disintegrate over time and leave behind leaks.) You can also buy a sheet-metal crimper that makes this step much easier and faster.


No Comments